

Post-Cure Pro
Product introduction:
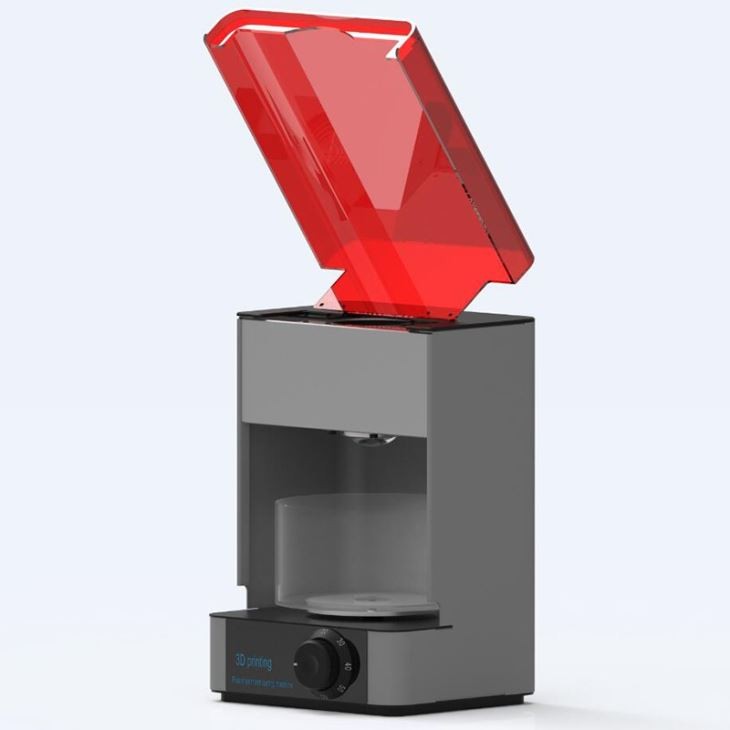
Rapid prototyping 3D resin model LED lamp UV curing box for DLP/SLA/LCD 3D printing, multi-functional post-curing treatment.
- Product Description
We are committed to the 3D printing industry,we have our own factory .Everything will be shipped soon and with high quality. Welcome to place order
DESCRIPTION
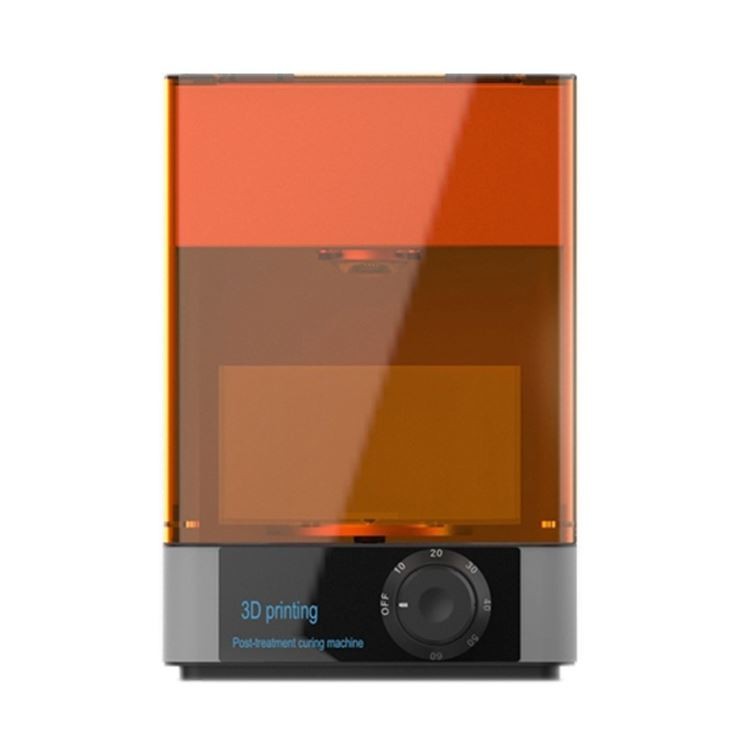
LED Light UV Curing Box
")
Rapid Prototyping 3D Resin Models LED Light UV Curing Box for DLP/SLA/LCD 3D printer.
Tesh Specs
")
Provide smart installation for your 3D printer, After installation, the machine will recognize your 3D
slice model and create the most optimized printing operation for you.
Feature
1.lightweight and easy use
2.knob timing
3.rotating tray make curing more well-distributed
4.curing in water reducing shrinkage and deformation
")
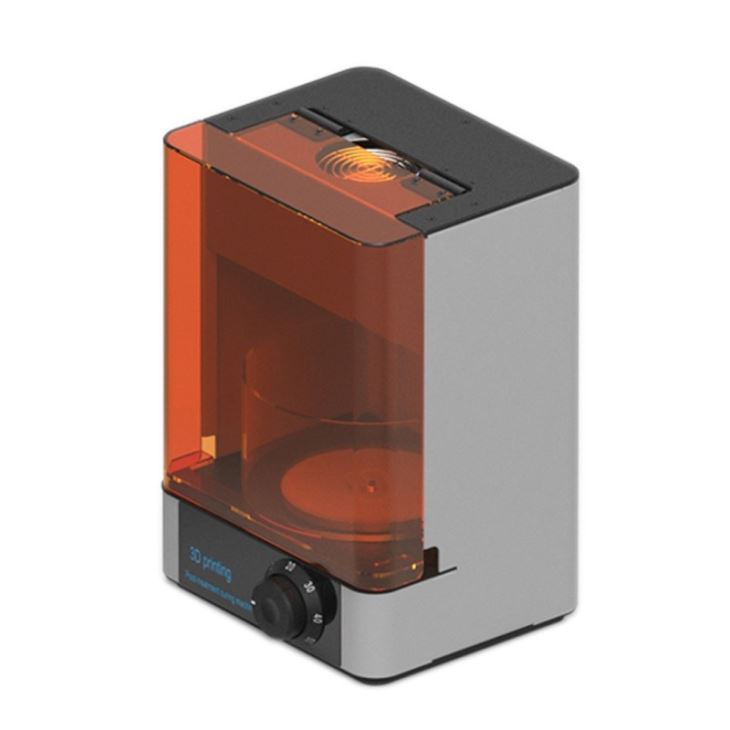
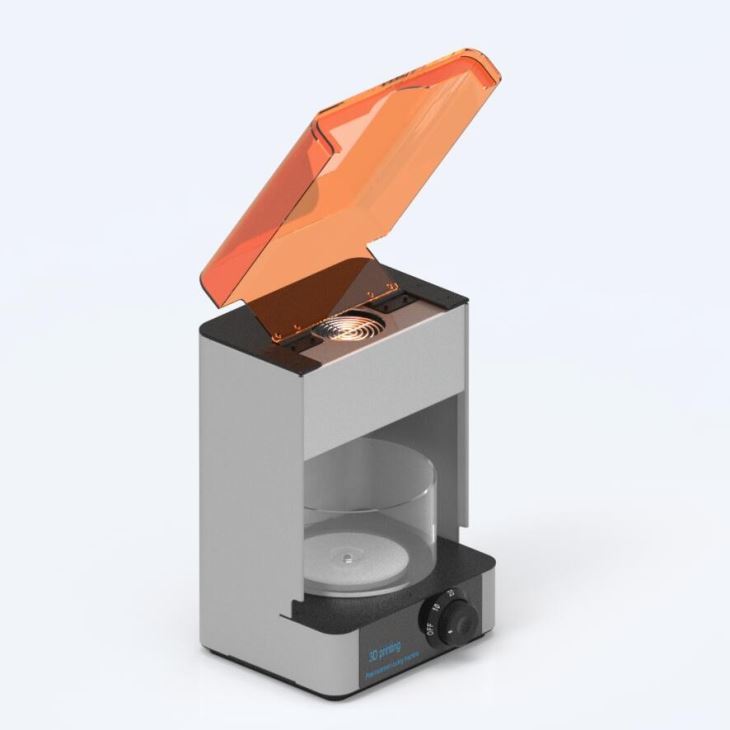
. Advanced heating system
Precise temperature control is the key to successful
post-processing
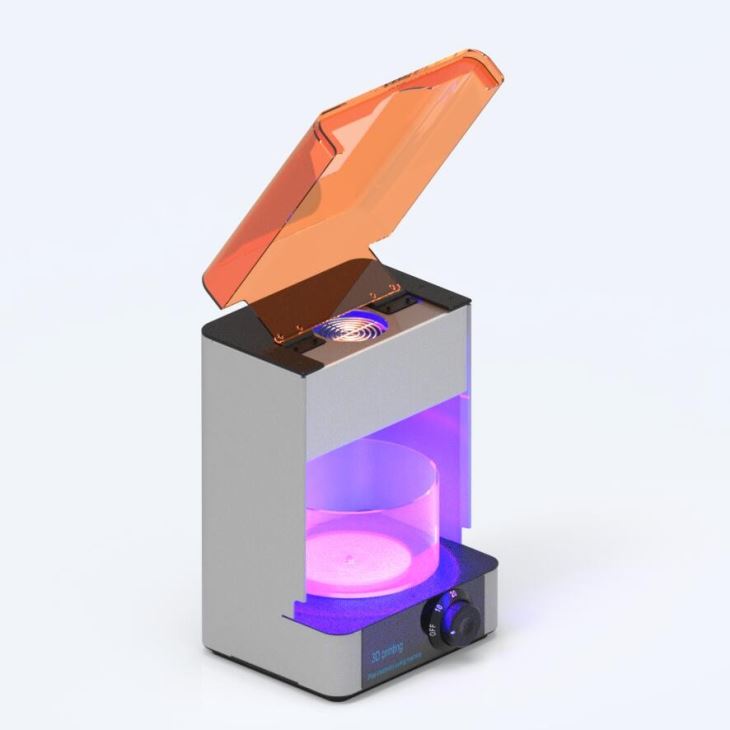
. Balanced light
The combination of LEDs can emit 405nm light to
induce a post-curing reaction and at the same time
post-curing the printed part together with the heater.
. Uniform exposure
Turntable, forced air heating and multi-directional LED
can uniformly post-curing printed parts.
APPLICATION
")
")
No matter what you need, please feel free to contact us.
Contact Us : xslightings@xslightings.com
-
The x-axis direction of the print model is offset
Resolvent:
1: The synchronous wheel on the x-axis motor is loose and the jacking screw on the lower synchronous wheel is tightened;
2: The belt is used for a long time and becomes loose. It can be tightened with elastic buckle.
-
How to replace the consumables in printing
Resolvent:
When printing filling or supporting, rotate the knob anticlockwise on the main interface of the display screen to adjust the printing rate FR100% to 10%. After the printing speed drops, press and hold the extrusion spring clip to quickly pull out the old consumables, and then load the prepared new consumables into the printer (note that the consumables should be inserted in place). Then adjust the printing rate to 30% - 40% to see if it can print normally, and then adjust the printing rate to 100% after everything is normal.
-
Leveling steps while printing
Resolvent:
When printing, rotate the knob anticlockwise to reduce the FR100% (printing rate) on the screen to 30%, and the printing speed will decrease. When printing the bottom layer, you can gently touch the printed consumables to see whether they are glued to the platform. If not, it means that the gap between the nozzle and the platform is too large. Adjust the platform here until the consumables near here can stick to the platform In other places.

